Viser innlegg med etiketten remake. Vis alle innlegg

3. februar 2014

More candlesticks

These candlesticks are really addictive so here are some more that I have made lately.
They will be decorating my staircase until they find new owners. (My wall is a work in progress, I want it filed with a lot of random stuff so that it becomes a collage)


One is in blue and white with an chinese theme.


This one is also in blue and white with a touch of greyish beige. 


This one is a little more colorful burgundy red and green with the white. 


I like this trio in my staircase so I don't mind if they dont sell :)

27. januar 2014

Candlesitcks from repurposed china

I dont have my own workwshop so I have to use my livingroom or kitchen when I have a project going. But my china jewelery created a lot of dust when I cut the plates so I need to be outside for that. Norway is either very cold or very wet during the winter months so no more jewelery will be made until spring. That made me thing if there were other ways to upcycle cina and in a way tht wasnt as messy. Then I remembered some candlesticks from Anthropologi that I saw a few years back. I googled a little and found the picture again.


Inspired by this I started by going on a treasure hunt at my lokal thrift shops.

Then I spent a lot of tme trying out different combinations and when that was done I had to assemble the whole thing. I realised that the candlestick would become very heavy so just gluing would not be enough. So off to my local hardware store I went to get a metal pole to put i the middle for stabilisation.

Then I had to drill holes trough all the parts, cut the matall to desired lenght and then finish off with some glue.

My first attemt looks like this:


Its 60 cm tall in white and silver. Sadly I realised that noe of the parts had a little crack in it after assembly so I will keep this candlestick for my self.

The next two are a little shorter and they were given away as christmas presents.


7. november 2013

Repurposed ties

I've had some old and colerful ties laying around for ages. I have tried several things with them but nothing really worked befor I got my hands on some flex frames. They were just the right size so I could turn the ties into small coin purses.


I love the bold and colerful pattens from the 70s


But after making these purses I have learnt to love the less colerful and more tradidional brown stripes as well.


To open you just squeeze the two sides togheter.


5. oktober 2013

Purses of reused material

Judging by the activity on my blog you might think not much creative work has been done by me lately. Luckily, that is not the case, I've just been to busy to get the things i have done online.

I'll start off by showing you some purses in various sizes suitable for many things.


 They are made for many different tings such as tablecloths, pillowcases, old tapestry, ribbons and more.The flat one has a strap that can be attached so that it can be used as a wrist clutch.


The two biggest ones are big enough to carry shampoo bottles and are lined with oilcloth so that they can be easily cleaned if something got spilled inside them. 


7. oktober 2012

My new hallway

Things are finally coming together and even if there are still a few finishing touches left I thought I would show you my new hallway.
It had yellow walls that I tried to hide behind colorful storage and lots of pictures. The storage has been replaced by these crochet hanging baskets. I found the pattern for these the same place as the plastic bag dispenser.


Under you see a before picture of my hallway, and even if i did do some reorganizing after this picture was taken it still looked horrible.


To most of my friends surprise i decided to go all white with this makeover. The reason is because there are very little natural light coming inn so I had to do everything I could to compensate for that.


To get the shoes away from the floor I got some cheep shoe boxes from IKEA and the coats are hanging from a curtain rile from the same place. I put black vinyl on the floor to ad some contrast and changed the fabric on my stool to make it fit into my new scheme.


On the other side of the room I have even more shoe storage (you would think that was enough but I still had to donate two bags full to my local charity shop. :) The mirror used to be silver so I gave it a little facelift with shiny black spray paint.   


The wall up the stairs is still a work in progress. Its going to be a display wall where I put everything that can be put on a wall. There will be a mismatch of both colors and shapes that will cover the wall completely. 


The one element that has been left untouched is my hama/perler image. It took me ages gluing in one bead at the time so I decided to use it as my color inspiration. So far I have only added the purple elemenst but I will try do find somewhere to add a little yellow and red as well.


http://savvysouthernstyle.blogspot.com
http://www.myrepurposedlife.net


25. august 2012

New cake stands


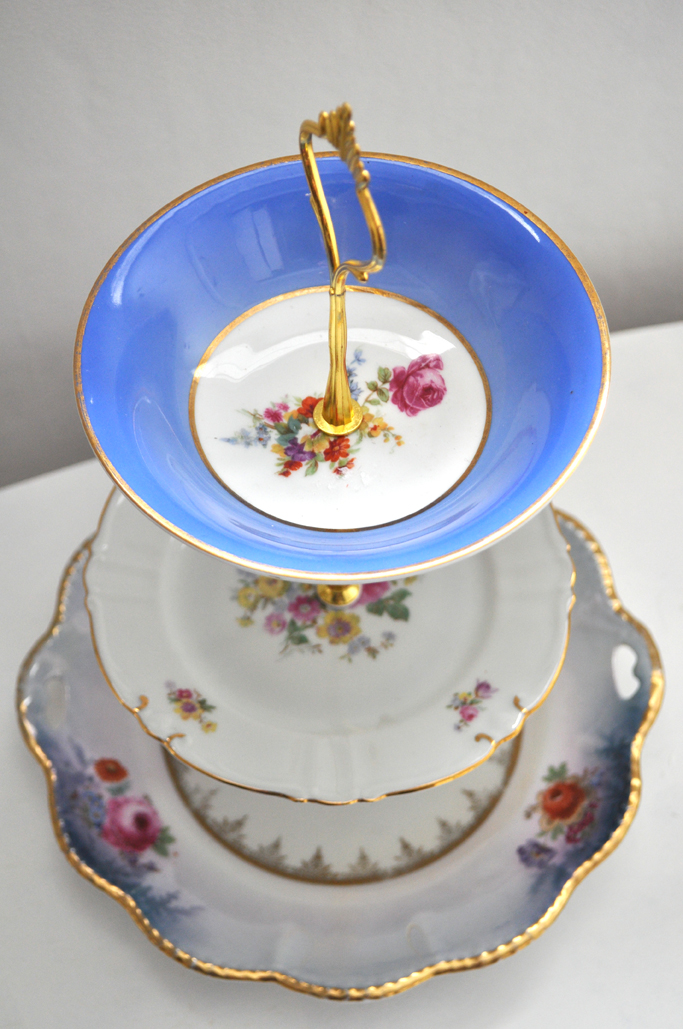
I don’t have access to my craft area and sewing machine at the moment. So when I need a break from work and doing up my house what I have left is my collection of china plates.  So I have been playing with patterns, colors and drilling holes. So far that has resulted in 3 new cake stands and one candy dish. All of them will eventually find their way into my shop.


Also I now have a new all time favorite stand, the blue with flowers on the right. I was considering keeping it for myself for a while, but this house makeover has made me realize that I already have way to much stuff, so what I need is to downsize not add to my collection.


I have been getting a lot of email about where i get the supplies to make these stands so I thought I shold add that information to the post. 
I buy all my supplies for E-bay or Etsy but here is no point of me giving you the name of a specific seller because I need them to ship to Norway so I'm not getting the best deals. But if you search for: "tier handles" you should get some results to choose form. 
I use a 6mm drill bit and it did take some practice. My best advice is to be patient because if you speed up the drill to much its very easy to break the plates. Te drillbits can also be found at E-bay or Etsy.
 

27. mai 2012

Stool redo

Still in hospital, the needle in my arm has been replaced with a new one and all the bacterias in my body has been killed except for the ones actually making me sick. But it feels like things are changing so I’m hoping I’ll be able to go home soon.


The last of the projects from my “playing with colors” weekend is this stool. As I do with most of my projects, I forgot to take a before picture. But it had its original silver colored legs and the seat had some sort of fake fur on it. Not really ugly, but very, very boring.

I took some scraps of fabrics and sewed them together to make the seat cover. The legs I covered with strips of fabric that I just twirled around. That bit I was not too sure of so I just fastened the fabric with double sided tape. Think I’ll end up removing it ant spray paint the legs in pink or turquoise instead, but for now I’ll leave it to see if it grows on me.


30. mars 2012

Rainbow colored storage


I really don’t like my hallway, and I haven’t liked if for as long as I have lived in this house.
I meant to paint it white many years ago when I was pregnant with my daughter. (Who will be 13 in a few months…)  I bought the paint and her father did the painting. What I didn’t know was that they had given me the wrong color, and my daughter’s dad just thought it was the way it was meant to be (He knew better than to argue with a pregnant woman :)


So for thirteen years I have lived with this horrible hallway and want nothing more than to do a proper makeover. But its small, cramp with a tilted ceiling, nocks and crannies and I don’t know enough about renovating to be able to pull it off by myself. So I have decided to go for the next best thing, camouflage. On one end I have started on a floor to ceiling picture wall that I’ll show when it has come a little further along.


But downstairs I decided to go for a mix match of colors. Just before Christmas I got some big cans form a very nice lady (thanks :) but had to wait for warmer weather before I could spray paint them. After the paint I drilled a hole in the bottom before screwing them up on the wall.

The picture next to them I made a few years ago by gluing one and one Hama bead onto wood. A very time consuming project (Which is why I only made this one) but I like it very much and think it goes well with my rainbow cans.

25. mars 2012

Cake stands


 I really like decorative ceramics plates so when I go to my local second hand shop I tend to bring one or more home with me. Some of them are in daily use as what they were intended to be used for but luckily we don’t break a lot of plates in this house, so my pile of plates that looks nice but are not needed keeps growing. So I decided to try to find new uses for them and so far they have become pendants, clocks and cake stands. Some of the cake stands were sold on a craft fair a few weeks ago, but the rest you can see here.


Drilling the holes was not easy, especially because the recommended drill bit that turns up when you google the topic is just crap. It’s shaped like an arrow and does only last for 2-3 holes so I started looking for something better. After searching for “diamond tip cake stand” this type of drill bit appeared:


It is more expensive, and at first, not easy to use, but after a few broken plates (that resulted in more jewelry that I will show you later) I got the hang of it. So now I have a life time supply of 2/3 tire cake stands that will go up for sale in my Epla and Pipler shop as soon as I get to take individual pictures of each one


My personal favorite was sold at the fair, but my second favorite is this stand of German flowery plates.
Probably because it reminds me of summer :)


http://savvysouthernstyle.blogspot.com/
http://myrepurposedlife.net

15. januar 2012

Wine crate shelves


Just before Christmas I got my hands on some wooden wine crates. They are brand new so the wood doesn’t have a nice aged patina, but I knew right away that I could turn them into a storage unit.  

I have an empty space (God forbid... right... :) in a corner behind the door that I have wanted to make into something useful for a long time and these crates were perfect. 


I played around a little before settling with the layout you see in the pictures.I didn’t want to paint the crates because I have a feeling that this corner won’t be their final resting place.


But because the wood was so new it needed“something” so I cut some scrapping paper to size and covered the back with that.


I didn’t have to buy anything to complete this project so I’m very happy to have new display shelves for free J

28. desember 2011

2011 summary


As we are coming to an end of 2011 I have decided to do a summary of my 10 most popular posts of this year.  My top 3 had about 3 times as many visitors as no 4 on the list so they are most defiantly in a league of their own.  (I do also have a blog in Norwegian, and the list over there is very different from this one, so if you want to see you can take a look here : )
To see the original post click on the images.
 

Number 10 on my list is shared between two posts. One was my first attempt to make a tutorial and I think it went down well. These posts are number one and three on my Norwegian list so it has boosted my confidence and I’ll be making more in the year to come.


Number 9 was a post about some Christmas stars I folded and my first visit to a craft fair. It was a fun experience and I hope to participate in a few more nest year.


Number 8 are some of my pendants. Domino and puzzle pendants are a passion of mine. All of the pieces are individual and one of a kind. I cut out every tiny bit of paper and glue them on to make unique pieces of art.


Number 7 is my experimental chair makeover.Used my favorite material and covered the chair in paper. It doesn’t go with anything in my house so sadly its still just stuck away in the corner waiting for its true purposeJ


Number 6 were my Christmas bulbs tutorial. I’m so glad you liked it!


Number 5 is one of my repurposed trousers bag. I really like this one and were using it dayly until I made this one.


Number 4 were one of the first owls I did sew together with a matching display shelf. Not sure how happy I’m with this project now, but for a first attempt it wasn’t too bad.

And then we have reached the top 3, they were in a leage of their own and the number one even surprised me a little so here we go:

Number 3: was my suggestion on how to organize your boots. This made my life easier this winter, being able to hover the floor without it turning into a huge project every time. Hope those who tried it found it helpful as well.


Number 2 you’ll find my owls I think their cute and apparently so did many of you J


And my number 1 most visited link this year was my denim bracelets. I like them very much but still didn’t expect them to become so popular. I have gotten a lot of emails requesting a tutorial, and I will be posting one in the first week of 2012.

All in all I’ve had far more hits than I was expecting and I’m very grateful to all of you who have visited me the last year and made my blogging experience so much fun! Hope to see all of you again next year!

Photobucket
Related Posts Plugin for WordPress, Blogger...